
As I’ve been surrounding myself with tree limb images in the studio, I’ve spent time looking at them. I’m enjoying the project and the experiments and like a lot of results.
Just as a reminder of how I’ve been proceeding, here’s a snapshot:

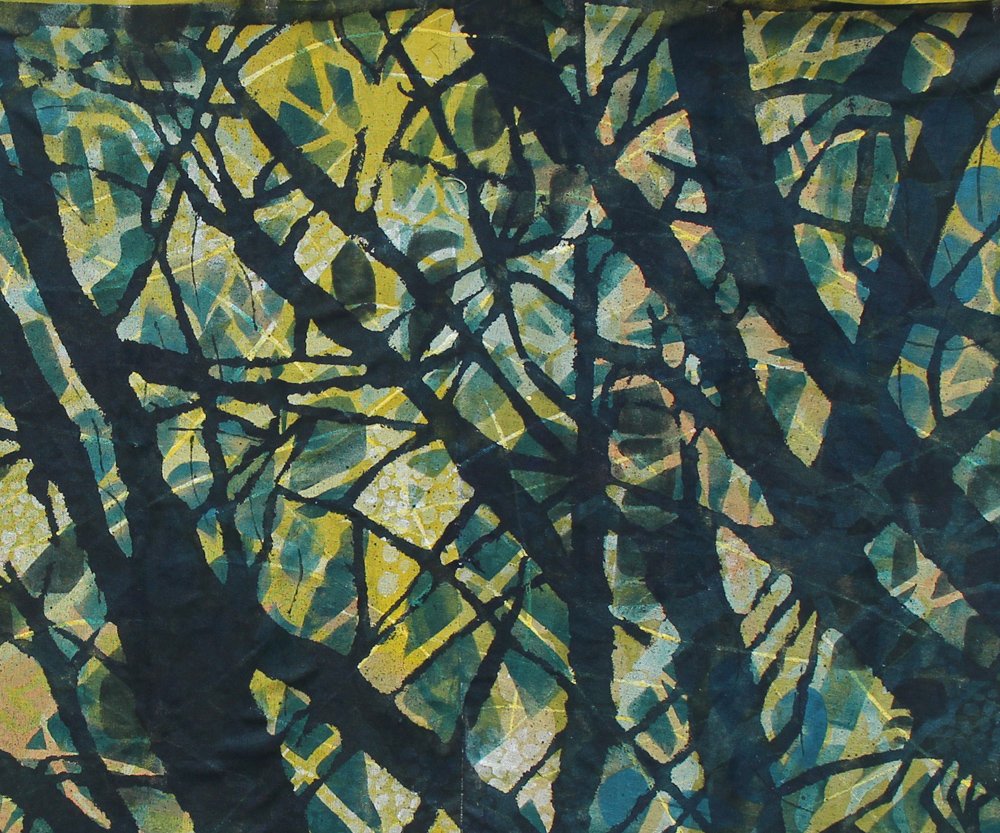
I invested time last month drawing and cutting a large cardstock stencil. I’ve printed several variations in different palettes.
What I realized this week, as I looked at the section shown above, is that I wanted some of these to have one or maybe two more layers.
What I want is a layer of dark trees in the foreground of the green-and-yellow-pattern. How to do this?
Option 1 – cut a stencil that’s the opposite, where the tree shapes are the open areas. Then when I print it, I’d be printing the final shape I want to see. I’ve done this many times before with other patterns. But the complexity of these limbs really makes them unsuitable for a stencil with a lot of little bridge pieces holding together floating parts.
Option 2: Use the existing stencil but use it to print a resist material like wheat paste. That way, I’ll be covering up the background and revealing the trees, ready for dark foreground painting. Great idea.
BUT – I created my stencil from card stock. Under its normal use for rolling on acrylic paint, it will hold up well for a long time. But wheat paste has to be washed off the stencil after printing. (Imagine pancake batter never washed off. It would just get gross.) I can’t hose off a card stock stencil. It would fall apart.
So this week I committed to cutting acompletely new limb stencil, identical to the first one, but made out of plastic. It took a few hours to trace it and cut it, but it will be a good time investment. Now I can create all kinds of layers. Here’s my new plastic stencil ready to lay down on the fabric:

Keep focused on the end product: printing dark trees in the foreground of a previously printed forest. (Printing resists involves multiple steps, so it’s easy to get lost. The end goal is important.)
Step 1: Putting down the resist. Here’s the new stencil getting put to use:

Above: I mixed up the wheat paste (flour + water) and poured it into a disposable tray; then I used a foam roller to spread the paste over the whole stencil.
After the whole piece was covered with wheat paste, while it was still wet, I pulled off the stencil, revealing the pattern.

I left it to dry on my worktable overnight.

Step 2: Overpainting Remember: the paste resist is covering up the background. So, I’ll now be painting the actual tree shapes.

Above center is the painted fabric outside drying in the sun.
Step 3: Take off the resist After the acrylic paint dried, I dunked the whole fabric piece in a bucket of water and went inside for a nap. When I came out, the wheat paste had softened up and I scraped it off with a spoon to get rid of most of it. (At this point it’s gloppy and messy.) Then I finished cleaning the fabric outdoors with the garden hose.
Step 4: Look at that! Here’s the result:
Things you might wonder:
Why cut the plastic stencil by hand? Couldn’t I use a Cricut (or similar) cutter or send it out for laser cutting. I could. But I actually like the tactile involvement this provides as I interact with the pattern. Further, this is also a pretty big stencil, possibly too big for higher-tech cutting methods.
Why not just paint the trees by hand, instead of creating a stencil? Two reasons. First, Painting on fabric with a brush does not yield the same appearance as rolling with a foam roller. Second, every time I wanted to use this pattern again, I’d have to draw it and paint it again. Now, I’ve invested in a stencil that will allow me to create the image quickly each time I want it.
What kind of plastic did I use? I’d be happy to share if I knew the answer. In my professional career years ago I worked in a printing company that produced nameplate products, and this was a sheet of material we used in the plant. It’s about .003 - .005” thick and not brittle. It may be Lexan. It is possible that something similar would be available by the sheet at home supply stores, but I don’t know what to recommend. If any readers use a similar plastic available in big sheets or rolls and want to share its name and source, I’ll be happy to tell readers next week.
. . .
For readers near Central Florida: I invite you to the opening of the Exhibit for 22 DeLand-area artists whose work was featured in the 2025 DeLand Area Off the Beaten Path Studio Tour. Information below. I’m proud to have two quilts included in the exhibit, which runs through July 5.

For all the artmakers: Happy creating
For all the art lovers: Happy appreciating
Thank you for reading. I always enjoy questions and comments.
--Bobbi
How I keep in touch:
BLOG POSTS - once a week: Mostly about what I am creating in the studio. If you would enjoy receiving blog posts by e-mail, please subscribe here: I post and send by e-mail each Sunday evening. BLOGS-BY-EMAIL
NEWSLETTER – about once a month: Mostly news of exhibits and my way of introducing new work. You’ll get FIRST LOOKS at new artwork and members-only discounts.You’ll hear from me about once a month. NEWSLETTER