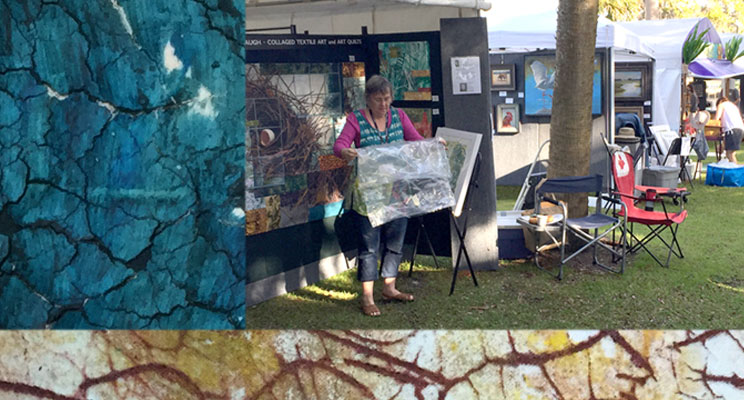
Exhibiting at the Tarpon Springs Fine Art Festival this past weekend, I enjoyed the chance to talk one-on-one with a lot of festival-goers about my process of artmaking. It’s great when people are interested enough to ask questions about how work is made!
I heard myself saying this a lot: “Much of the art is created BEFORE I put the whole work together.” I may –- and frequently do –- paint and stencil additional imagery on a piece after the parts are assembled. But this is not the primary stage of artmaking.
That happens at “square two” -– creating the printed yardage. I have come to use this stage as an integral part of the design, development and composition process.
(First a note about “square one:” working out concepts and designs in my sketchbook. That always comes first. I am happy when surprises occur along the way, but I don’t create yardage or collage fabrics randomly. I always plan where I’m going and make all the parts to accomplish a specific purpose.)
Meanwhile, back at “square two.” I work exclusively with acrylic paint on fabric. As I have concentrated on this medium for several years, I have worked to get the richest possible range of colors and effects. I mix the variables of what surface I am printing (rice paper, or sheer fabric, or cotton muslin fabric) with the quality of the paint (un-diluted straight from the jar, thinned with water or medium, or used wet-into-wet.) Most of my surface design techniques are very low-tech. I love that! I like the challenge of creating complex and subtle effects with simple methods.
Here are some work-in-progress shots from a large work I am developing in the studio now.
From my sketchbook… notes on a current work in progress
Square one: the sketch. I will create this work in a square format about 42” x 42”. I want a work that stirs emotion, dream and memory. I envision a soft overall effect, and some sense of aging or things past. (There is no title for the work yet. It will come to me at some point during the creation process.)
I decided to combine stencil painting with some wheat past resist. This is one of my favorite mark-making techniques. The first step is to mix up a batch of wheat paste. It’s just flour plus water. I mix it till about the consistency of pancake batter, then pour it all over the fabric., then use a credit card to pull the batter out to a very thin coating over the whole piece of fabric. If I get the thickness of the paste just right, I’ll scribe marks in the surface that will eventually print as marks on the fabric. Then I go away a minimum of 24 hours or till the paste is very very dry. It will start to crackle.
Wheat paste dried on fabric - a natural crackle pattern
Wheat paste dried on fabric - with marks made in the paste
Next, I crinkle the dried fabric/paste well to create more cracks, then spread acrylic paint over the top of the paste. The goal is to force the paint down into cracks. Again I go away for awhile to let the paint dry.
Fabric pieces with wheat paste plus paint, out in the sun to dry.
Wheat paste on fabric, with teal blue paint. The paint will go down into the cracks.
When it’s time to remove the paste, I fill a bucket with warm water and let the wheat paste get mushy so it can be cleaned off. Then I scrape it off and hand wash the fabric. (Generally, I do this outside in the garden hose.)
Here is some of the recent yardage I’ve created.
Now, I can begin to see the whole work take shape in my head. The sketch gave me a general sense of layout and proportion of parts. Now, I am inspired and interested in putting these parts together. The simple process of printing the fabric has become an integral element in the final work.
NOW for just a little tooting of my own horn:
I was honored to receive a $1,000 award of distinction at the Tarpon Springs Festival. I appreciated the thoughtful questions and decision-making process of the judges.
BLOG POSTS: If you would enjoy receiving blog posts by e-mail,
please subscribe here: BLOGS-BY-EMAIL
NEWSLETTER: If you enjoy more detailed behind-the-scenes stories,
as well as FIRST LOOKS at new works and members-only discounts,
I hope you’ll become a Studio Insider.
You’ll hear from me by e-mail about once a month.
Subscribe here: STUDIO-INSIDER-NEWSLETTER
I always enjoy questions and comments.
Thanks for reading.
Bobbi


